

Building a trampoline park involves more than just placing a set of trampolines in a hall to start the park. It is a process that combines concept, technology, safety, experience, and planning. If you know in advance what will happen in each phase, you can make better choices, stay within budget, and avoid surprises.
Sidijk guides entrepreneurs from the initial idea to the grand opening. Based on hundreds of projects, we show you what to expect when building a trampoline park. And what the process from design to realization looks like, step by step.
1) From idea to concept: refining your vision
Everything starts with a clear direction and a clear business plan. This phase involves questions such as: who are you building the park for, what kind of experience do you want to create, how does the trampoline park fit into the region, and how can you best finance the park? You need to consider:
- Target group: families, teenagers, athletes, or a mix;
- type of park: sports-oriented trampoline park or a complete Family Entertainment Center;
- Atmosphere: sporty, futuristic, adventurous, or fully themed;
- role of catering, birthdays, and group packages.
What you can expect from Sidijk at this stage:
- contributing ideas about target groups and concepts based on market data and practical experience;
- an initial rough zoning plan based on your ideas and a floor plan of the available property;
- advice on combinations of zones that perform well at similar parks.
This creates a concept that is not only appealing on paper, but also feasible and profitable in practice.

2) DWG drawings as a starting point: the technical basis
A DWG drawing is the technical basis for the design of a trampoline park. The DWG contains all the dimensions and structural elements of the building and forms the starting point for a realistic layout. Once a building is in place, the focus shifts to technology.
In deze fase gebeurt het volgende:
You provide the DWG drawings of the building. These include the exact dimensions, columns, doors, windows, and available height. Sidijk checks whether the space is suitable for the concept: consider the minimum height for the main court, possibilities for High Performance trampolines, space for catering, and sightlines for supervision.
What you can expect from Sidijk:
- an initial feasibility check based on the DWG drawing;
- advice on any adjustments to routing, altitude usage, and layout;
- clarity about what is and is not possible within the existing building structure.
This is where the technical basis for the design is laid.
3) 2D design: build your trampoline park on the floor plan
The DWG drawing serves as the basis for the first actual design: the 2D design. A 2D design is the floor plan that shows the zoning of the trampoline park. This is the phase in which you first see how the construction of the trampoline park translates into a concrete layout. The 2D design shows:
- the location of all zones (main court, interactive games, foam pit or AirbagOriginal, toddler zone, freerun zone, indoor playground, etc.);
- the routing of visitors from the entrance to the catering facilities and exit;
- spaces for catering, waiting areas, changing rooms, and sanitary facilities;
- sightlines for surveillance and safety.
What you can expect from Sidijk:
- a clear 2D layout to scale based on your building;
- space for feedback and adjustments;
- advice on optimal walking routes, overview for parents, and efficient use of floor space.
Once the 2D design has been approved, the layout is finalized and the next step can be taken: the 3D design.

4) 3D visualization: experience the trampoline park before construction
A 3D visualization shows what the trampoline park will look like in real life, including color, volume, and atmosphere. Whereas the 2D design is primarily functional, the 3D design makes the experience visible. This is the moment when investors, municipalities, and you yourself can really see what the trampoline park will look like. The 3D design shows how zones work together, how volumes relate to each other, and what atmosphere the park exudes.
The 3D visualization shows elements such as color use, materials, height differences, routing, and thematic atmosphere. You get a realistic picture of how visitors will move around the space and what impression the park will make upon arrival.
Important to know:
Graphic editing, such as full-color prints, branding, or personalized elements, is not placed directly in the 3D design. First, the spatial design is approved. Once the 3D design has been approved, we present the graphic proposals. We indicate exactly where full-color panels, banners, and other prints will be placed. The customer then receives the final print proposals to provide feedback or give approval.
What you can expect from Sidijk:
- a realistic 3D visualization of the entire park;
- the ability to fine-tune colors, graphics, and branding;
- advice on how to best showcase your brand and story in the space.
Once the 3D design has been approved, the experience is finalized and the technical development process towards production begins.
5) Engineering and safety: from attractive visuals to safe design
Building a trampoline park requires more than just a pretty picture. Safety and technology determine whether the park complies with standards, legislation, and inspection requirements. In this phase, Sidijk works on, among other things:
- calculation of safety distances around trampolines and zones;
- detailing of steel structures and anchoring points;
- alignment of materials with fire and safety requirements in the relevant country;
- integration of emergency routes, escape route signage, and sightlines for supervision.
What you can expect from Sidijk:
- het ontwerp wordt getoetst aan relevante normen en richtlijnen;
- you receive clarity about any additional requirements from inspection authorities;
- the final technical design is ready for production and installation.
This bridges the gap between visual and executable plan.
6) Production: your park takes shape in the factory
Once the design and engineering phases are complete, production begins. At the factory, we prepare all the parts needed to fully assemble your trampoline park on site. These include trampoline mats, protective edges, parts for interactive zones, and various components for the construction that match the design. Graphic elements such as printed mats are also processed here so that they can be attached in the right place during assembly.
An important part of this phase is the processing of foam and PVC. Foam is used in protective edges and padding to ensure that areas are safe for intensive use. The PVC material, which provides the recognizable colors and appearance, is cut to size and sewn in the factory. This ensures a long service life and protective finish for the components in the park.
All steel and wood components that will later become part of the structure are also carefully prepared and assembled at Sidijk. This preparation ensures that on-site assembly runs efficiently and that the end result is sturdy, safe, and neatly finished.
What you can expect from Sidijk:
- carefully prepared components that fit perfectly with the design;
- foam and PVC finish that contribute to safety and long service life;
- clear production planning and insight into progress;
- accurate quality control before parts are shipped to the site;
- A single point of contact that monitors the entire process from preparation to delivery.

7) Installation: setting up the trampoline park on site
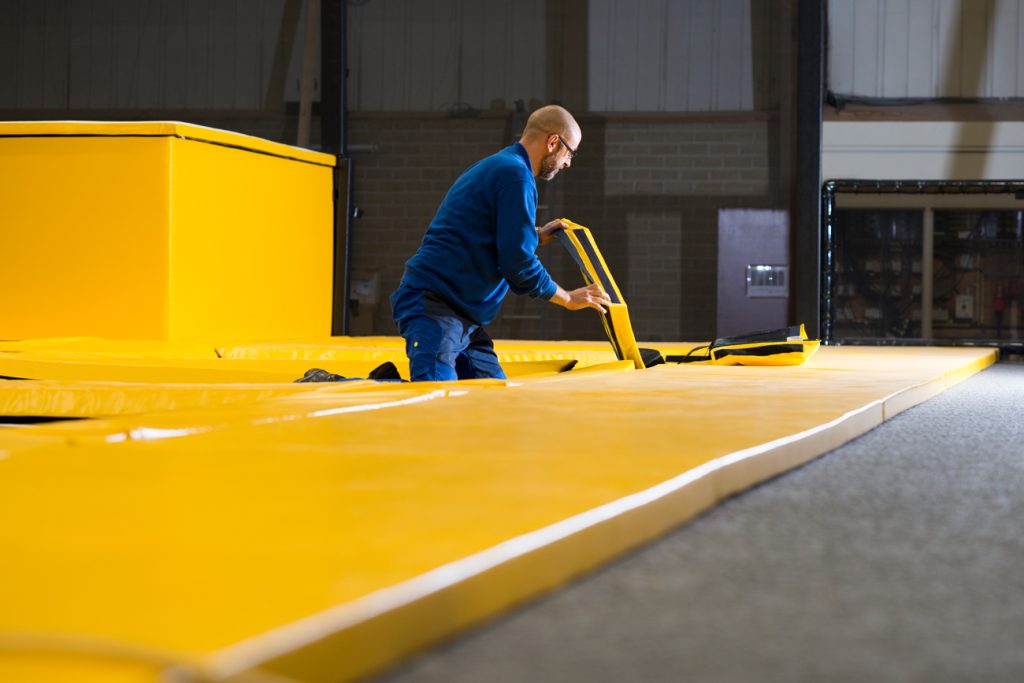
Once production is complete, all components are transported to the location and installation begins. The assembly is carried out by a specialized team that is fully trained in building trampoline parks and knows exactly how to install the structure, trampoline mats, PVC finishes, and interactive zones according to the design. During construction, continuous checks are carried out to ensure that the park is being built in accordance with the design and safety agreements.
What you can expect from Sidijk:
- an installation schedule that fits in with your construction or renovation schedule;
- professionalism in the workplace, with attention to safety and cleanliness;
- Interim coordination on site, for example regarding technical details or minor adjustments.
Depending on the size and complexity of the park, installation takes several weeks on average.
8) Inspection, training, and preparation for the opening
After installation comes the commissioning phase. This phase is all about checks, inspections, and preparing for daily operations.
What you can expect from Sidijk:
- a delivery in which all zones and activities are tested;
- support with external inspections where necessary;
- an official handover ceremony for the park, including:
- explanation of the entire park, including all activities and interactive elements;
- considered the certificate;
- transfer of the manual for the delivered elements, including advice on maintenance, cleaning protocols, inspections, and daily safety checks;
- training for staff on use, supervision, and basic safety.
Entrepreneurs can opt for a soft opening at this stage. This allows the team to practice processes, reservations, and visitor flows before the grand opening takes place.
9) Further development and expansion: building long-term success for your trampoline park
Building a trampoline park does not end with the opening. In practice, a park grows along with the market and the target group. New interactive games, thematic upgrades, or extra zones keep the offering fresh and attractive for returning visitors.
At Sidijk, we consider the following aspects right from the design stage:
- areas that can be easily expanded later;
- opportunities to renew thematization;
- space for future additions such as a Basketball Area, a Multi Sport Arena, a Dodgeball Area, an AirbagOriginal, or interactive games.
This is how your park will evolve from a one-off project into a concept that will continue to surprise visitors for years to come.
Frequently asked questions
How long does it take to build a trampoline park?
Building a trampoline park takes between 8 and 20 weeks on average. The design and technical preparation take several weeks. Production follows after that. Installation on site usually takes 2 to 6 weeks, depending on the size of the park.
How much does it cost to build a trampoline park?
The investment for a trampoline park often starts at around €250,000 and increases depending on size, zones, and theming. Compact parks cost less, while larger or themed parks require more investment.
What steps are involved in building a trampoline park?
The process consists of five steps: analysis of the DWG drawing, 2D design, 3D visualization, production of all components, and installation on site. This is followed by inspection and training of the team.
What do I need to start a trampoline park?
You need a suitable building, a DWG drawing, and a clear concept and business plan. This is followed by a layout in 2D and 3D visualization, giving you insight into routing, safety, and experience.
How do I choose the best location for a trampoline park?
Choose a building with sufficient height (at least 5.5 meters), good accessibility, and sufficient parking space. A region with a strong target group within a 20-40 minute travel time increases the chance of success.
Ready to build your trampoline park
Building a trampoline park requires a structured process, smart choices, and a partner who manages the entire process: from DWG drawings to 2D and 3D design, from graphic editing to production, installation, and delivery.
What you get from Sidijk:
- one partner for design, engineering, production, and installation;
- clear steps and expectations at every stage;
- customization in experience, banding, and full-color graphics;
- A park that is ready for opening and future growth.
Would you like to discuss your plans or have your DWG drawing assessed? Please contact our team. Together, we will take the next step from idea to realized trampoline park.


